
Check the skin
The cheeks and forehead can look smoother, but they should not turn waxy or flat.
Watch the hair
Hair should keep separate strands around the face, not smear into one dark shape.
Look at the background
The gray background should clean up without creating blotchy patches.
How to use it
Run noise reduction review in this order
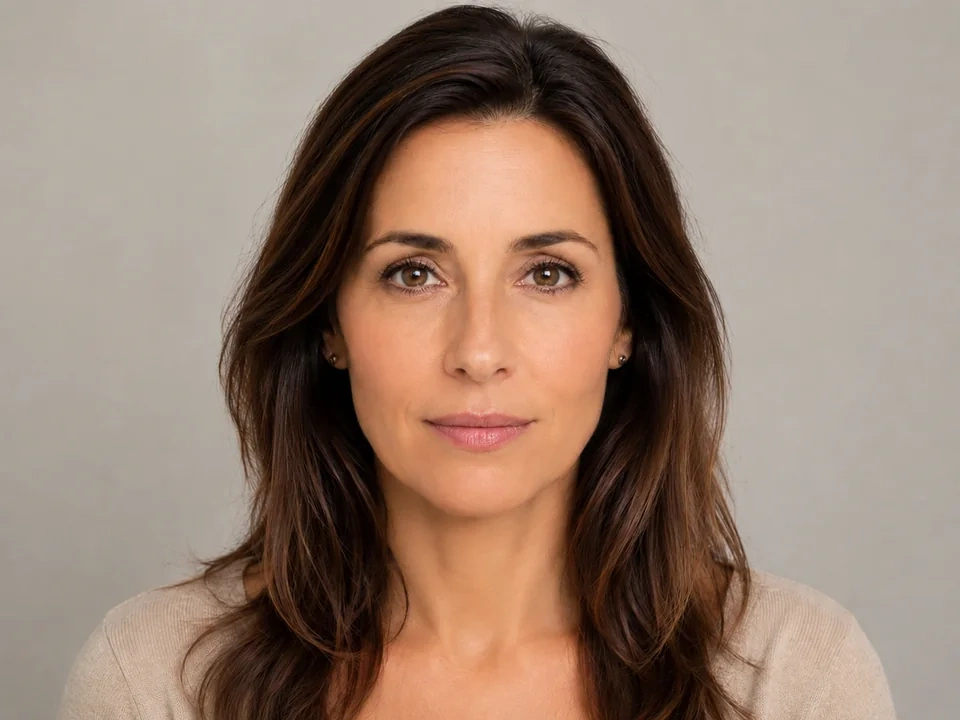
Use the portrait example
Start with the reference image on this page. The same checks apply when you compare a portrait with skin, hair, eyes, and a plain background.
- In this example, the cheeks and forehead are the first smoothness checks.
- Around the face, check loose hair strands and darker hair edges.
- The gray background should become cleaner, not blotchy.
Move noise reduction in small steps
Noise reduction smooths small specks. Small moves help clean the background and skin without wiping out hair, eyes, and lip detail.
- Raise noise reduction a little if the background or skin has visible specks.
- Use a smaller move if hair strands start blending together.
- Reduce noise reduction if the eyes, lips, or sweater texture lose detail.
Use the slider on important areas
Drag across the parts people read first, then check the areas most likely to break.
- Drag over the cheeks, forehead, and nose first.
- Move across the eyes, lips, hairline, and loose hair strands.
- Check the sweater and gray background before keeping the edit.
Read the result cards
The cards summarize the size and direction of the change. Look back at the preview to judge the visible result.
- If noise reduction shows a big change, go back to the skin and background.
- Look back at the eyes, lips, hair strands, and sweater texture.
- Keep the edit only if the portrait looks cleaner without looking smeared.
Examples
Common noise reduction fixes
Skin turns waxy
The cheeks look cleaner, but the face starts losing natural texture.
- Use a smaller noise reduction move.
- Check the cheeks, forehead, and nose.
- Look back at the eyes after reducing it.
Skin should look cleaner without becoming flat.
Hair gets smeared
Noise is lower, but hair strands around the face start blending together.
- Reduce noise reduction.
- Check the hairline and loose strands beside the face.
- Compare the darker hair edges with the original.
Hair should still have separate strands and soft edges.
Background gets blotchy
The gray background looks smoother in places but uneven in others.
- Use a smaller move.
- Check both sides of the background.
- Return to the face before keeping the result.
The background should look calmer, not patchy.
Result checks
What to inspect after noise reduction changes
Skin
Check the cheeks, forehead, nose, and chin for waxy smoothing.
Eyes and lips
Check eyelashes, eye highlights, lip edge, and small facial detail.
Hair
Check the hairline, loose strands beside the face, and darker hair edges near the sweater.
Background and sweater
Check the gray background and sweater texture for smearing or blotches.
Noise Reduction effects
What noise reduction changes
Small noise reduction
- Specks in skin and background become less visible.
- Use it when the portrait looks a little noisy.
- Check cheeks, forehead, and gray background.
Large noise reduction
- Fine detail can smear or disappear.
- Use it only when noise is stronger than the detail.
- Check eyes, lips, hair strands, and sweater texture.
Skin
- Natural texture can become too smooth.
- Reduce the move if the face looks waxy.
- Check cheeks, nose, forehead, and chin.
Hair
- Separate strands can blend together.
- Reduce the move if hair turns soft or painted.
- Check the hairline and loose strands around the face.
Decisions
How to act on the noise reduction result
Noise is lower and detail stays
Keep the edit if skin and background look cleaner while eyes, lips, hair, and sweater detail remain clear.
Face or hair gets smeared
Reduce noise reduction if skin looks waxy, hair blends together, or the background turns blotchy.
The source is too damaged
Use a cleaner source file if smoothing only hides detail without improving the portrait.
Common issues
What can make noise reduction review misleading
Smooth skin can look better too quickly
The face may look cleaner while natural texture disappears.
Hair reveals smearing
Loose strands around the face show over-smoothing before the whole portrait does.
Eyes need a close check
Small eye highlights and lashes can soften after a strong move.
Plain backgrounds show patches
The gray background can turn uneven if noise reduction is too heavy.
Try it