
Check the glass edge
The bottle outline should look cleaner, not doubled or outlined with a bright rim.
Watch the cap
The rose-gold cap can sharpen nicely, but the dark vertical reflection should not turn harsh.
Look at the background
The beige background and soft shadow should stay smooth. If they start looking gritty, reduce sharpness.
How to use it
Run sharpness review in this order
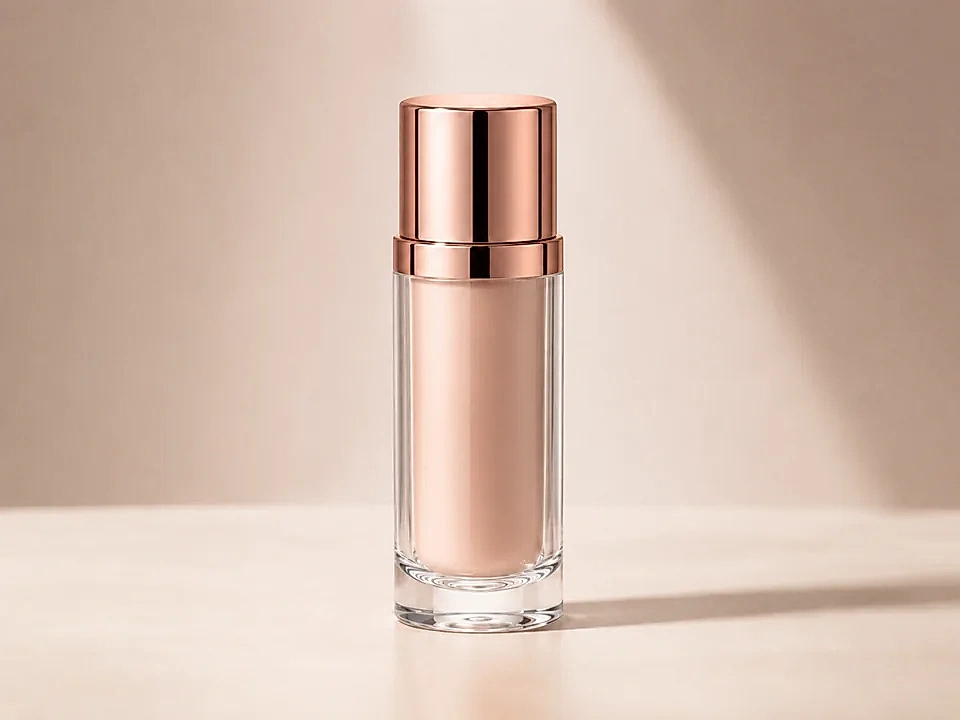
Use the product bottle example
Start with the reference image on this page. The same checks apply when you compare a product photo with glass, metal, and a soft background.
- In this example, the glass sides and bottle base are the first edge checks.
- On the cap, check the black vertical reflection and the thin metal rim.
- The beige background and soft shadow should stay calm after sharpening.
Move sharpness in small steps
Sharpness makes edges stand out. Small moves help the bottle look cleaner without adding halos around the glass or rough texture in the background.
- Raise sharpness a little if the glass edge or cap looks too soft.
- Use a smaller move if the bottle outline starts to glow.
- Reduce sharpness if the background, shadow, or label area starts looking rough.
Use the slider on important areas
Drag across the parts people read first, then check the areas most likely to break.
- Drag over the left and right glass edges first.
- Move across the cap, dark reflection, and bottle base.
- Check the beige background and soft shadow before keeping the edit.
Read the result cards
The cards summarize the size and direction of the change. Look back at the preview to judge the visible result.
- If the edge card shows a big change, go back to the glass outline.
- Look back at the cap, bottle base, label area, and soft shadow.
- Keep the edit only if the product looks clearer without looking crunchy.
Examples
Common sharpness fixes
Glass edge gets a halo
The bottle outline looks clearer at first, but a bright rim appears along the glass.
- Use a smaller sharpness move.
- Check both sides of the glass.
- Look at the beige background beside the edge.
The glass should look clean without a visible outline around it.
Cap reflection turns harsh
The rose-gold cap looks crisp, but the dark vertical reflection becomes too strong.
- Reduce sharpness slightly.
- Check the cap highlight and dark stripe.
- Compare the cap with the softer label area.
The cap should stay metallic, not hard or cut out.
Background gets gritty
The product looks sharper, but the beige background and soft shadow start showing specks.
- Lower the sharpness amount.
- Check the shadow to the right of the bottle.
- Return to the glass edge after reducing it.
The background should stay smooth while the bottle edge improves.
Result checks
What to inspect after sharpness changes
Glass outline
Check the left and right bottle edges for halos or doubled lines.
Rose-gold cap
Check the cap highlight, rim, and dark vertical reflection.
Bottle base
Check the bottom glass rings and small bright edges near the table.
Background and shadow
Check the beige background and soft shadow for grit, specks, or rough patches.
Sharpness effects
What sharpness changes
Small sharpness move
- Glass and metal edges become easier to see.
- Use it when the bottle outline feels a little soft.
- Check the glass edge, cap rim, and bottle base.
Large sharpness move
- Edges can look too hard or outlined.
- Use it only if the source is very soft.
- Check the glass sides and dark cap reflection.
Halos
- Bright rims can appear beside strong edges.
- Reduce sharpness if the bottle starts looking cut out.
- Check the edge between glass and background.
Smooth areas
- Plain background and soft shadows can turn rough.
- Use them to catch over-sharpening.
- Check the beige wall and the shadow to the right.
Decisions
How to act on the sharpness result
Edges look cleaner
Keep the edit if the glass, cap, and bottle base look clearer while the background stays smooth.
Halos or grit appear
Reduce sharpness if the glass gets a bright rim or the beige background turns rough.
The photo is still soft overall
Use a cleaner source file or a different edit if sharpness only makes artifacts more visible.
Common issues
What can make sharpness review misleading
A crisp edge can hide a halo
The glass may look sharper while a bright outline appears along the bottle.
Metal reflections get too hard
The cap should stay glossy and metallic, not harsh or cut out.
The base shows artifacts quickly
Small glass rings at the bottom can turn jagged after a strong sharpen.
Smooth background reveals over-sharpening
The beige wall and soft shadow can show grit before the product looks wrong.
Try it